Ever needed to add a note to a Tableau dashboard without editing and republishing the entire workbook?

Using parameters, calculated fields, and a show/hide container, you can create a simple way to enter and display custom notes directly on your dashboard.
In this tutorial, we'll:
The result: A dashboard where users can enter and update notes on the fly.
Note: Parameter-entered notes are session-based and aren't automatically saved back to your data source or shared with other users.
Ready to download the example workbook? Click here.
Start by creating a String parameter for each part of your dashboard note.
Using separate parameters for the header and paragraphs lets us format them independently and display multiple lines of text.
For each parameter:
First, create the parameter for your note header.

Next, create separate String parameters for the body of your note.
In the original example, the header and paragraphs use individual parameters. This allows you to control their formatting and line breaks independently.
Give each parameter a descriptive name, then enter a default value if you'd like to preview how the notes will appear on the dashboard.
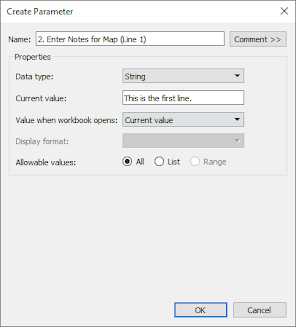
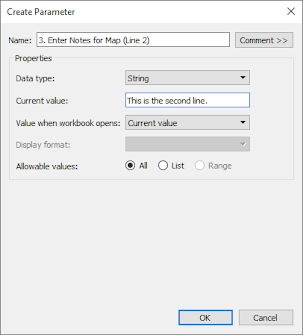
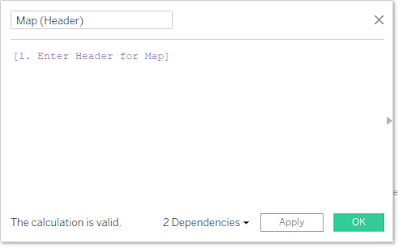
This is a super simple step. We only need to reference the parameter in a calculated field. That's it!
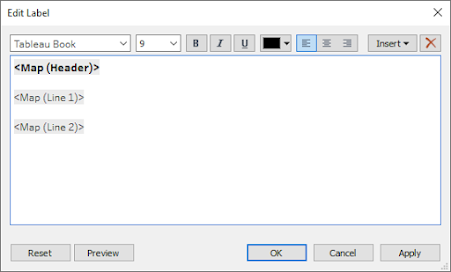
To display the notes on the dashboard, we create a worksheet and bring in the calculated fields we just created into the Text on the marks card.
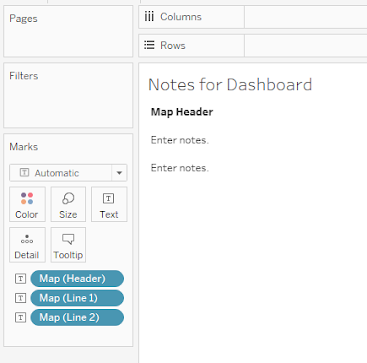
It is here we can introduce formatting.
Place the worksheet on the dashboard where you'd like to display the notes.
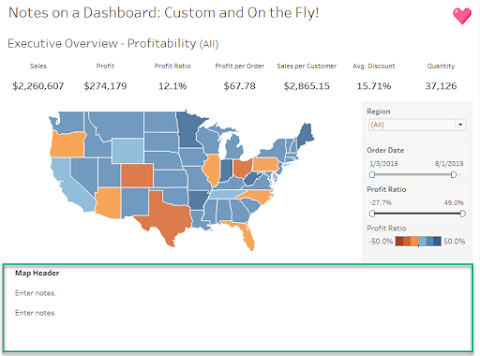
Time to put the rabbit in the hat! These parameters do not need to be exposed to the end user, so we're going to hide them from the default view but still have them available to edit.
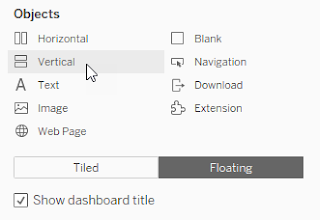
To accomplish this task, we are going to create a floating vertical container, place the parameters in the container, hide the menu, and then toggle from floating to tiled.
1. Create a floating vertical container.
2. Place the parameters in the floating container.
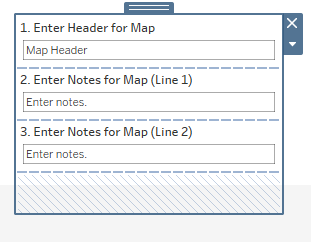
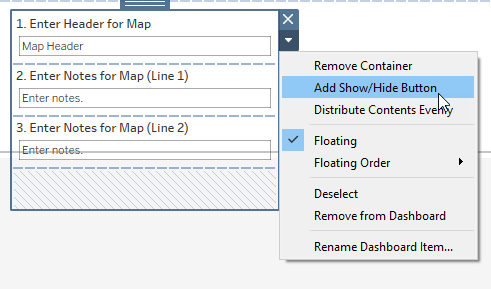
3. Click on the down arrow of the floating parameter, and select "Add Show/Hide Button"
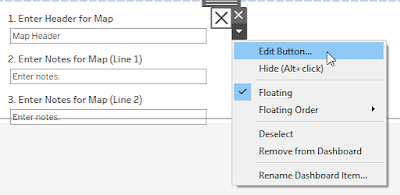
4. Next, click on the "X" and select "Edit Button..."
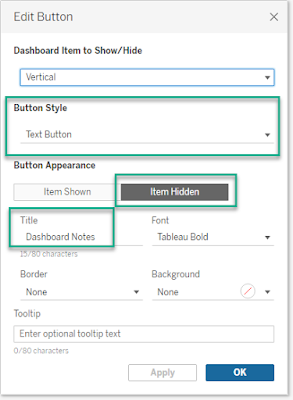
5. For this step, I make the button the title of the notes. To do this, choose "Text Button" for the Button Style and type "Dashboard Notes" for the Title when the item is hidden.
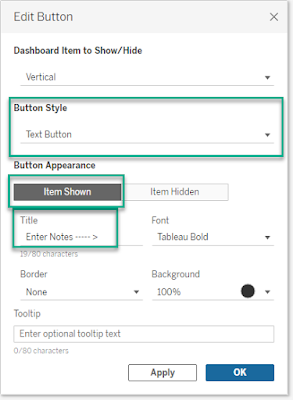
When toggled to "Item Shown", type "Enter Notes" and (if you'd like) include a text arrow "----->" pointing towards where the floating container will pop up. (You are able to move the "shown" floating container with your mouse and place it where you'd like it to appear.)
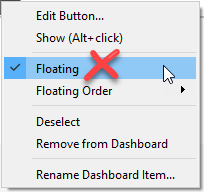
6. Next, unselect "Floating" and place the title above the notes already placed on the dashboard.
And that's all there is to it!
Please feel free to contact me if you have any questions or comments.
Happy vizzing! 💗



Have a question or just want to say hi?
I'd love to hear from you.